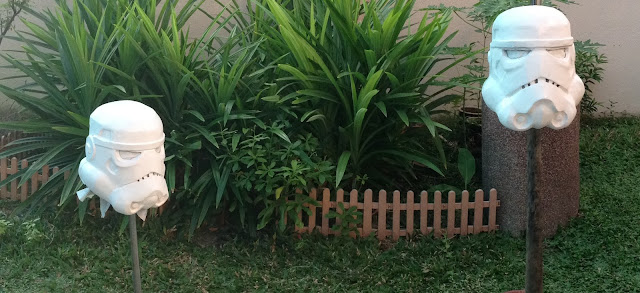
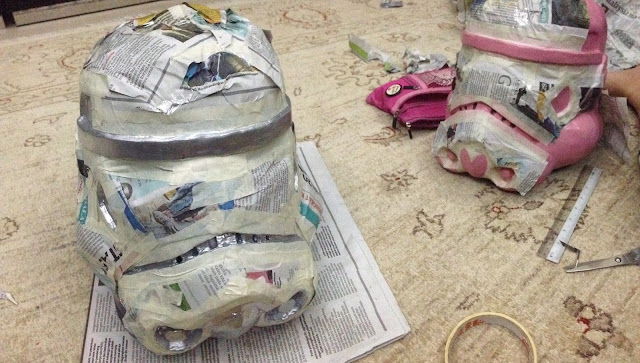
Assalamualaikum. Hi blog! Today i would like to share you a little project that Iqbal and i did after the end of our degree. Daripada before final exam lagi iqbal dah tunjuk dekat i templates dia. I pun teruja, tergetar-getar nak buat tapi masa tu tak ada masa. Bila dah habis paper, boleh focus buat, yay!
Iqbal jumpa templates dekat web ini -> http://dali-lomo.blogspot.com/2014/10/star-wars-stormtrooper-helmet-diy.html in which templates can be downloaded (thank you sir). You should really have a look at his blog, so many masks, helmets and other stuff too.
Since that Iqbal and i loves star wars, we decided to make our own TROOPER HELMET!
DAY 1, 12/07/2015
Iqbal provided the corrugated box for us both. We printed our own templates and the cutting begins.
DAY 2, 13/07/2015
Still cutting. Berpindah ke dalam rumah sebab dekat terlalu panas. Lagi-lagi masa itu bulan puasa.
DAY 3, 14/07/2015
Third day, finally done with all the cutting!
DAY 4, 15/07/2015
Then we proceed with shaping these by using hot glue gun with the help of masking tape + paper clips. For this part, we did it while watching the video that is also from the blog as a guide. For me, the hardest part is the top of the head. To get that round shape... Aiya, so hard. I got emotional and Iqbal did it for me. Heehee.
DAY 5, 16/07/2015
We are both excited to continue assembling these boxes but its already late. Thus, we continued at our own house. And finally done! (well not entirely yet) Moving on to the next step: Paper mache.
Facetime ♥
His.
Mine.
DAY 6, 18/07/2015
We added the ear and eyebrow (sort of) part and decided to paper mache it together. For the outer part, we did it with old newspapers. For the inner part, we used tissue paper.
Mine.
His.
DAY 7, 19/07/2015
Let it dry!
DAY 8, 23/07/2015
Most exciting part for me, putty filler time! (+ PVA)
DAY 9, 24/07/2015
Let it dry!
DAY 10, 25/07/2015
Sand paper!
His. Before and after.
Have to do it outside due to the mess. Although mama cakap boleh buat dekat dalam, tapi risau berdebu.
Too thin, we added more putty filler.
DAY 11, 26/07/2015
I got quite tired with this stage. Sand paper urgh tiring. But papa gave us his small driller. Thus makes it more easier, especially for the teeth/mouth part.
DAY 12, 27/07/2015
Still fixing on any unsatisfied shape.
DAY 13, 28/07/2015
Still...
His. Before and after.
DAY 14, 29/07/2015
Just some more sand paper. Then thats it, its spray time!
Mine. Before and after.
Before spraying.
White spray!
DAY 15, 30/07/2015
Proceed to spray it with the colour that we want. Of course, mine is pink!
As for the black parts, we also use spray can.
Defects. Hm. But Iqbal fixed it for me. Thank you!
DAY 16, 08/08/2015
Final stage, clear spray.
There, Iqbal had fixed it for me.
DONE!
Arrivederci~


